
The Mine
TYPE: Personal Project
RESPONSIBILITIES:
-
Designed the layouts of the map. Modeled the level in UE4.
-
Designed, prototyped, scripted, implemented and balanced the entire functionality of the the level, from puzzle logic to platforming sections.
-
Scripted two custom player mechanics and created custom VFX for visual feedback.
-
Scripted trigger events taking place throughout the level.
-
Used diverse asset packs to set dress the level and achieve a unique and cohesive look.
-
Edited and modified smart materials to provide variety within the same overall aesthetic of the asset packs. Lit the entire level in-engine and optimized it in terms of light complexity, lightmass density and player collision.
-
Created and textured custom shapes in Maya for the puzzle pieces.
SOFTWARE USED: UE4, Blueprints, Maya, Photoshop
INSPIRATION:
-
Star Wars Jedi: Fallen Order: Player mechanics, platforming sections
-
Prey (2017): Sci-fi aesthetic, design of lab sections
-
Horizon Zero Dawn: Cauldrons, a machine inside a mountain
-
Portal: Reveal at the end.
"The Mine" is a first person puzzle-platformer level with a sci-fi aesthetic. The main idea behind this project was to create a puzzle platformer where players would use the same mechanics both for puzzle interactions and platforming. Taking inspiration from Star Wars Jedi: Fallen Order, I wanted player's core ability to have to do with intervening to the movement of the environment. This gave birth to the idea of "Freezing" and "Reversing" time, idea unlocked a lot of potential for interactions that pertain both puzzle-solving and platforming. The final result incorporates to a large degree many of the initial design intents, providing a level designed to be experienced as a journey from the captivity of the lower cauldrons of a mine to the freedom of the outside world.
GAMEPLAY VIDEO AND IMAGE GALLERY


LAYOUT AND BASIC PRINCIPLES
The layout is designed in a way that it resembles a mining facility inside a cave; labyrinthine cavities of diverse proportions connected with control stations, all positioned around a massive tower-like structure. This structure functions both as a point of reference throughout the level as well as the place players have to reach in order to complete the level. Players begin the level inside one of those cavities. Throughout their journey they are presented with a sequence of platforming and puzzle solving sections, which they have to overcome in order to escape the facility. It is important to note that the scripted cinematic events have functional impact on gameplay as they help players test specific mechanics or create new pathways for them. In this way, the level feels more as a dynamic, living world that reacts to players' actions.


PROCESS: FROM CONCEPT TO COMPLETION
Step 1: Reference Moodboard and relationship with gameplay.
I initially composed a moodboard with different references and images best depicted my first design intents. The aim here was to dissect each reference and understand the elements they are being comprised of. I paid special attention in how Prey (2017) uses lighting as a means of providing direction and also how some laboratories in the same game feature different elevations in their architectural layout. I focused on this latter element because it is a spatial arrangement we regularly find in many sci-fi inspired spaces. I also examined different cave illustrations from different pop culture references in order to point out common elements, in terms of layout, scale and complexity. Finally, I decided to use light itself as a hint of player's final destination and a clue that provides context as to where this place exists.
Direction: Using multiple light sources to guide players
Multiple levels: Labs with different elevations - complexity - enhances sci-fi feel?
Overall Layout: large central area with small , narrow pathways surrounding it.

Props: Set dressing and environmental storytelling
Center of Interest: Main light source. A landmark with gameplay importance: A way out?
Step 2: Designing Layout and Puzzles - From the paper in the engine.
Basic principle was for players to use the same basic "Freeze - Reverse Time" interactions both for puzzle - solving and platforming. A secondary restriction was that these challenges had to make sense in the environment of a mine. As such, I started designing simple mechanical components and thinking how players could impact their movement. Simultaneously I made the first diagrams for layout, in order to get a good understanding of the overall progression of the level. Relatively early, I blocked out a whitebox in Maya and imported it in Unreal to prototype the basic environmental obstacles players would face.
EARLY THOUGHTS
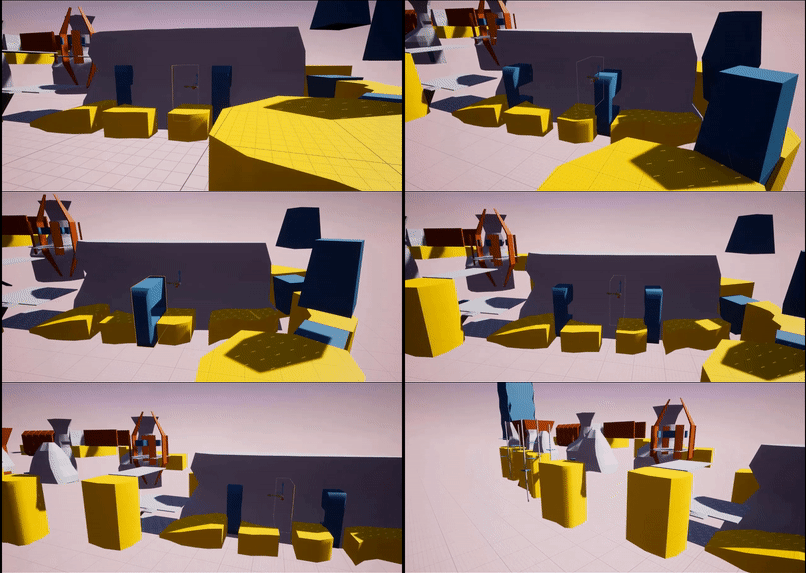
On of the first iterations on the level.
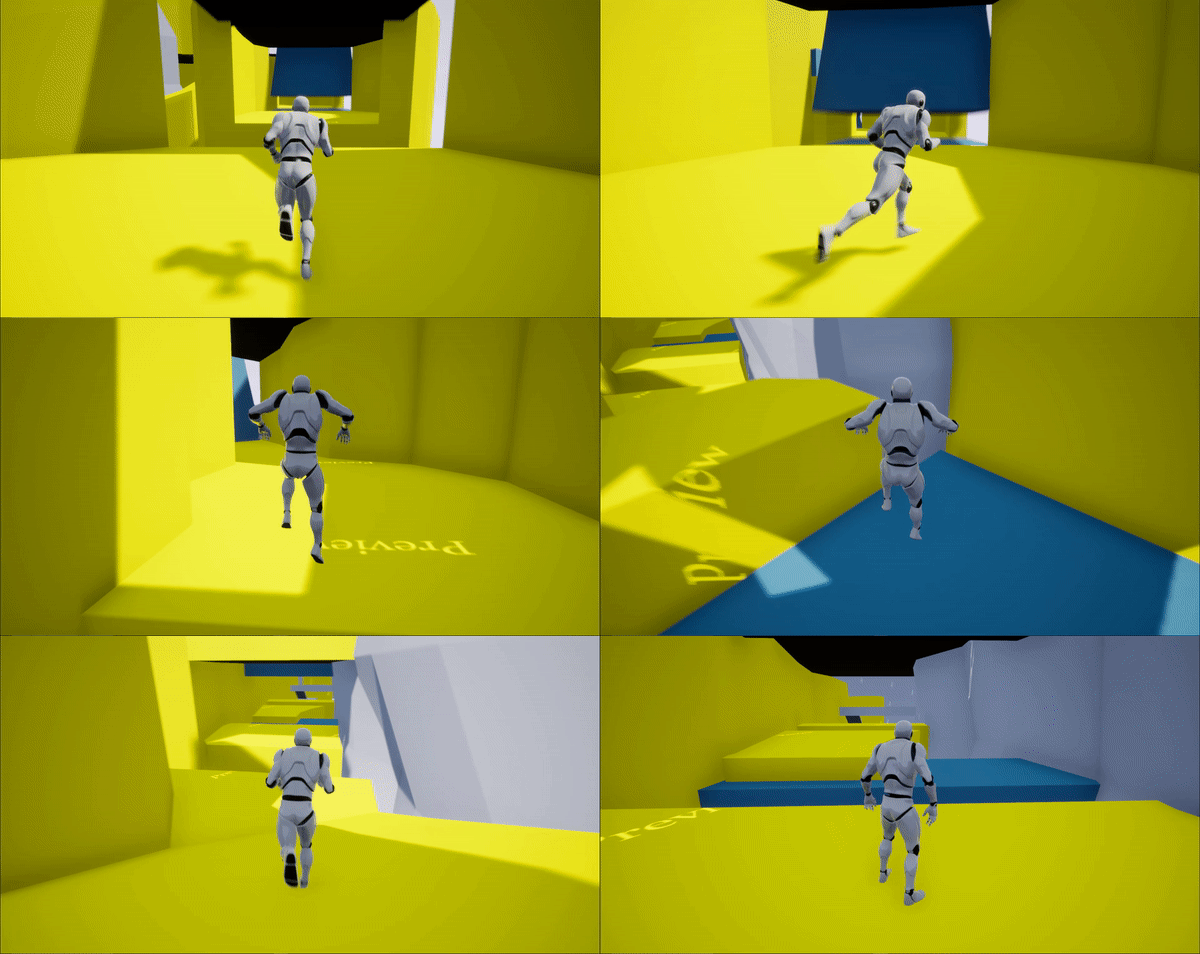
Player "freezes" time to pass through the moving presses.

One of the first iterations on the layout and prototypes of the environmental obstacles. Although some ideas were interesting, additional work needed to be done in order to have a more cohesive environment and not just an obstacle course. One major piece of feedback I got through playtesting was that the obstacles were interesting but each one looked like they belonged to a different level of the same game. To address this issue I decided to explore fewer types of platforming interactions (such as the one presented in the second gif) and in more depth rather than a plethora of interactions in a very surface level.

Player "reverses" time so that the rotating panel changes direction, revealling a path.
BRINGING IT ALL TOGETHER
In the next iterations, I moved towards a more cohesive and contained layout (displayed in the sketches on the right). I also started combining elements I thought were useful from different puzzle prototypes I had scripted. Since the main challenge was to create a puzzle framework that would make sense in the environment of a Mine, I retained those elements that could be easily translated into mechanical devices and contraptions. The end result was a series of puzzles based on controlling mechanical presses and aligning mechanical components.


Players have to make mechanical presses reach specific buttons by controlling controlling them.
Alignment puzzles: Test players' pattern recognition skills. Once all the elements are aligned, the puzzzle is solved.
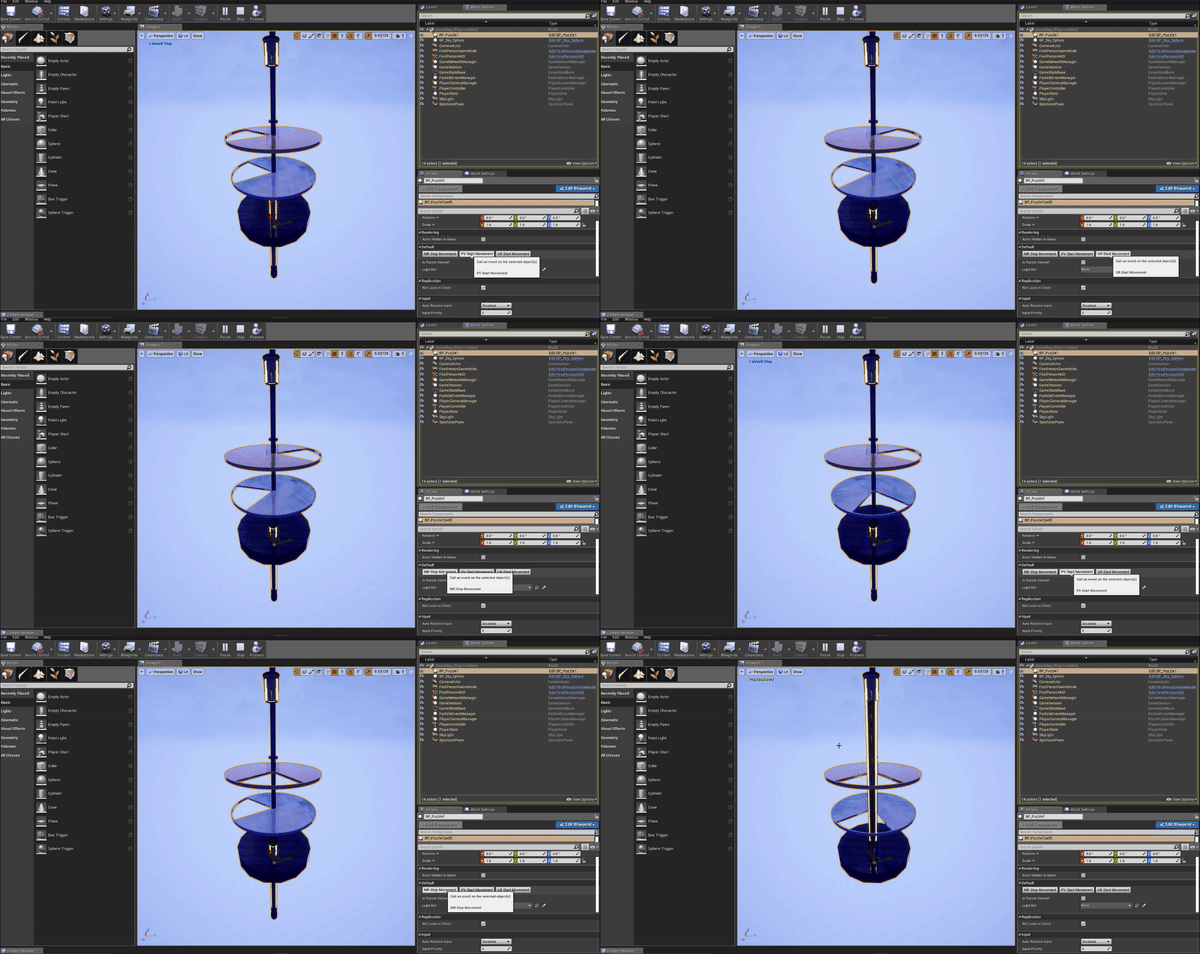
The final design behind the puzzles involved the two main concepts discussed above. Aligning rings in a way that a mechanical press can pass through them and reach the upper part of the contraption. In the actual level, players encounter three different iterations of these puzzles, escalating in difficulty as well as the mechanics that require the players to use.


Interaction: Freeze time
Interaction: Reverse time
Interaction: Freeze + Reverse time
Step 3: From Whitebox to Set Dressing.
Next step was to whitebox the entire level in UE4 and perform playtests. Based on the fact that platform distances and jumping heights were essential to core gameplay, I transitioned the entire modelling process from Maya, directly to UE4 to streamline the process. Next, a very important aspect of this process was balancing the platforming sections. Adjusting the distance between each platform and their moving/rotating speed were crucial in creating platforming sections that oppose a challenge but can be beaten. Working on the proper implementation of the player controller was also a crucial aspect of this phase. When the balancing issues were resolved, I started set dressing and lighting the level.
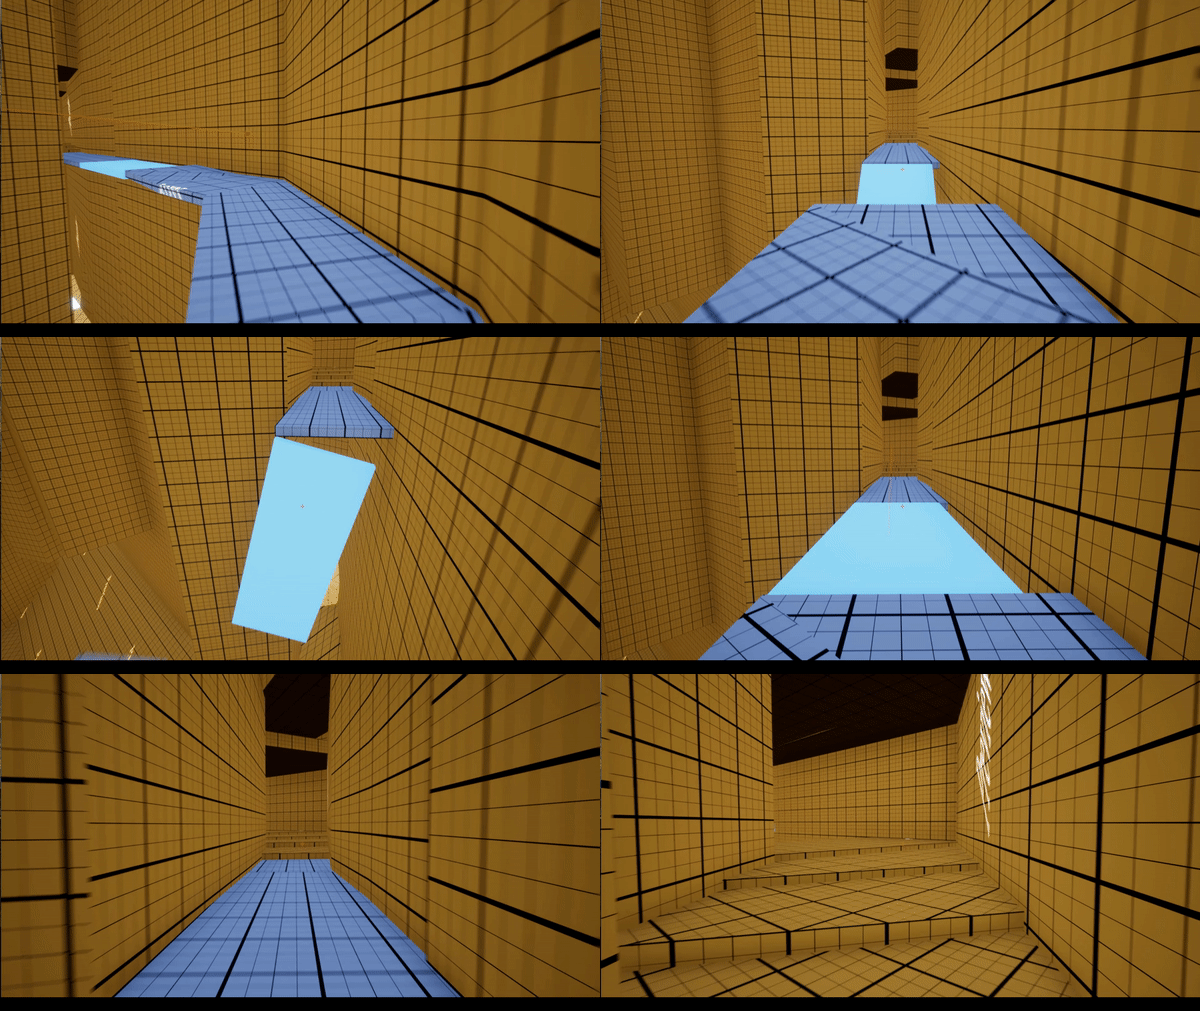
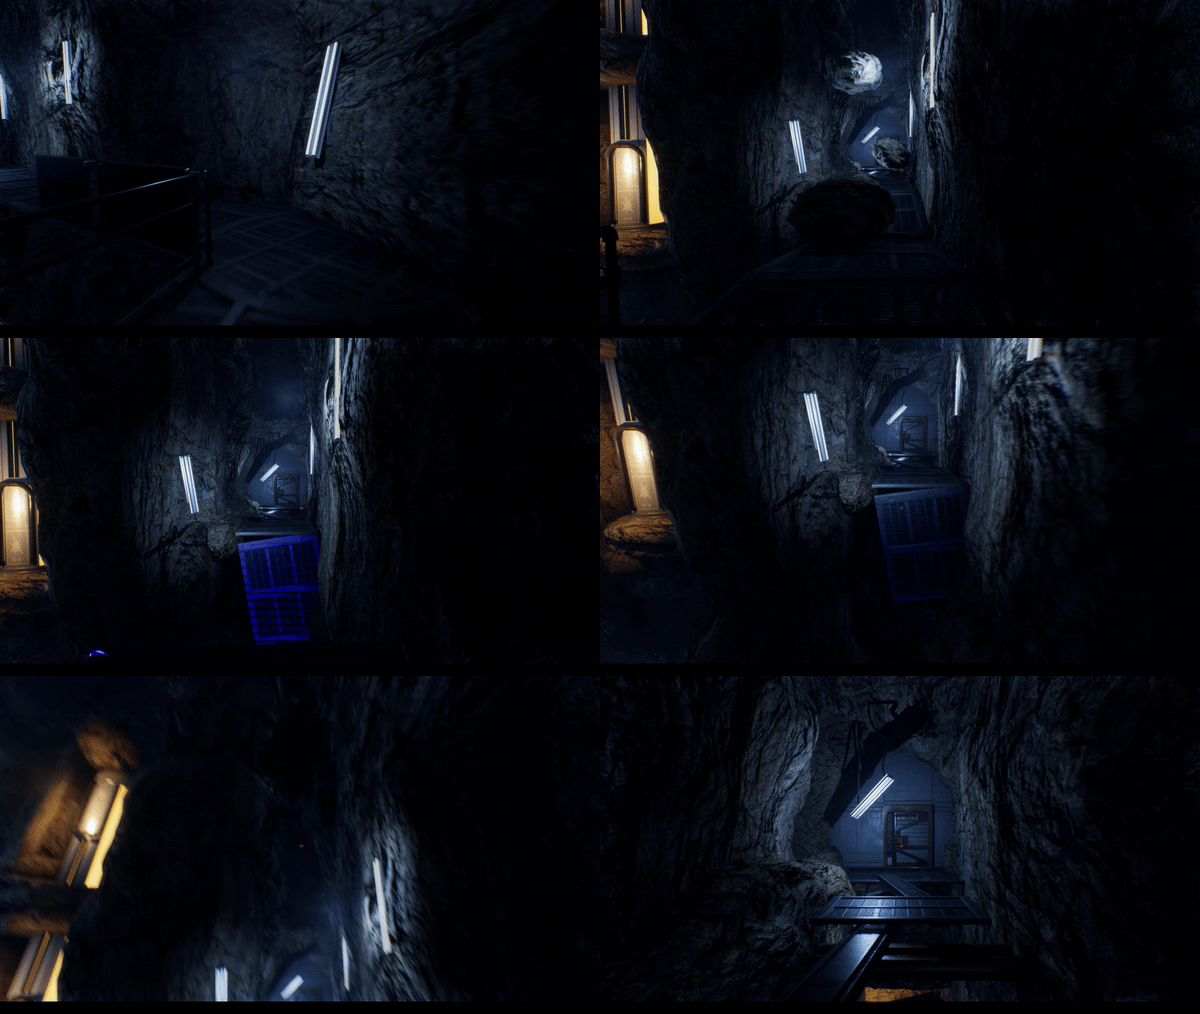


Set Dressing the scripted events: Some of the assets that were important for the scripted events (such as the platform that breaks through the wall in the second series of gifs) weren't included in the asset packs. Modeling and unwrapping them in Maya was pretty useful so I could stay as close to initial whitebox as possible.


Gameplay changes during this phase: One of the most drastic changes was the layout of the main tower. The final iteration involved removing the external steps and adding big boxes where players have to jump from one to the other.


Appearance changes during set dressing: Due to the fact that the assets included in the asset packs didn't favor inclined building facades and floors. For this reason, I iterated on the layouts of specific lab sections of the level so that they can be properly set dressed by the existing asset packs.
Step 4: Optimization
For this stage, I did specific optimization passes on the entire level. These included light complexity, lightmap density, shader complexity and collision pass. This was a very valuable experience for me, as it included redistributing some of the lights in the level as well as downgrading some of the textures in the main cave area.


LESSONS LEARNED
Key Takeaways
-
Prototyping Puzzles: This was an essential part of the design process. I had initially underestimated how many different iterations it would take to come up with a design framework that could simultaneously make sense in the current context, utilize level's core mechanics and have a design that can be used in different variations. I feel that after this project I have developed a process to tackle similar challenges in the future.
-
Planning level progression and layout: One of the things that I had in mind from the first stages was to have a clear idea of the entire level. How will players traverse each environment, what skills will be tested and also how will difficulty change. I believe that this was a crucial way to keep this project in scope.
-
The importance of set dressing: Admittedly, I underestimated the time and impact set dressing can have in such a big environment. Coming up with a hierarchy among the assets and separating them in "primary", "secondary" and "details" was integral to manage time constraints and overcome this challenge. In this way I went from the general and main architectural elements to finer details without a lot of backtracking.
Technical Skills honed:
-
Visual Scripting - UE4 Blueprints: For this project, I scripted the entire functionality of the level - player mechanics, the puzzle logic and the platforming behavior. I also prototyped and experimented with many different iterations of the puzzles before concluding to the ones I finally implemented. This was a very valuable experience for me in order to get more comfortable with blueprints, blueprint-to-blueprint communication, classes and inheritance as well as vector math.
-
UE4 Sequencer: Gained valuable experience using the sequencer to signify the solution of each puzzle and also for the in-game scripted events
-
Modifying existing asset packs: In order to handle scope and provide a cohesive yet varying look, I had to edit many of the materials of the asset packs. I also had to reference them in my custom blueprints to change them in-game. Finally, I had to combine different materials from different asset packs. Therefore, I got comfortable with the entire architecture of each mesh (master material, material instances, textures, references etc.) and now it is way easier to alter some of those properties of needed.
-
Optimization: This project was also very art-heavy. Consequently, getting familiar with how to optimize such a level in terms of lighting complexity, player collision and lightmap density was an important technical experience.